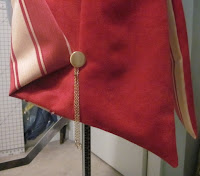
I knew I needed some way to fasten the front so I picked up some copper/gold chain and matching hooks while at Jo-Ann Fabrics to string across from button to button (with hooks on opposite sides so it looks more balanced) and came up with this:
 |
| Front detail of the Colette Coat! |
 |
| Back chain detail of the Colette Coat! |
 |
| Chain tassel on the button of the Colette Coat! |
When I finished that I still had some short lengths of chain left. So I divided them into two tassels, attached small gold rings on the end of each and attached them to the buttons on the tails.
 |
| Colette Coat sleeves! |
Finally, I finished up the sleeves that my friend wanted to be reversable and cuffed. I only had limited fabric to use as we hadn't originally planned on making them so I got creative. The red side of the sleeve fit the standard sleeve pattern with no room for a cuff while the stripe side had 5 extra inches in length.
So, I cut them out and sewed them together (right sides together then turned with the sleeve cap top-stitched closed) and pressed the sleeves so when it is red fabric out the sleeves are full length with a striped cuff. With the striped fabric out, the sleeves are just below elbow length with a deep red cuff. Then I put two grommets in the top of the sleeve (matching the two that are hiding under the sleeve cap) and laced them together with red leather.
And the Colette Coat is now officially done! Once it's mailed to my friend who commissioned it, I'll post pictures of her entire outfit as the Ringmaster Colette Nagin from the Cirque de la Vapeur.
0 comments:
Post a Comment